APPLIES TO:
Connect your domain to HubSpot so that your HubSpot content can be accessed on the web. After connecting a domain, you can publish HubSpot pages, blog posts, knowledge base articles, and web versions of emails to it.
Please note: a CMS Hub subscription is required to connect a www subdomain.
Before you start
- Review the structure of URLs:

- Ensure you have access to the CNAME records in your DNS provider. Learn more about adding and editing DNS records in your DNS provider.
- If you're moving an existing live website to HubSpot, review the domain verification process if you want to pre-provision SSL for the domain.
- If you're keeping part of your website outside of HubSpot, do not connect that subdomain to HubSpot. For example, if your main website is hosted on WordPress at info.mywebsite.com, you should not connect your info subdomain to HubSpot. Doing so will take down your external content.
- HubSpot does not provide SSL certificates for domains that exceed 64 characters. This limit includes the subdomain, domain, and top-level domain. If your domain needs to be longer than 64 characters, you can enable SSL by purchasing a custom SSL certificate. To set this up, contact your customer success manager.
- If you have a CMS Hub subscription, you can redirect your root/apex domain in HubSpot. To do this, connect the root domain as a redirect domain. Otherwise, you'll need to set up the redirect within your DNS provider.
Connect your domain
- In your HubSpot account, click the settings icon settings in the main navigation bar.
- In the left sidebar menu, navigate to Website > Domains & URLs.
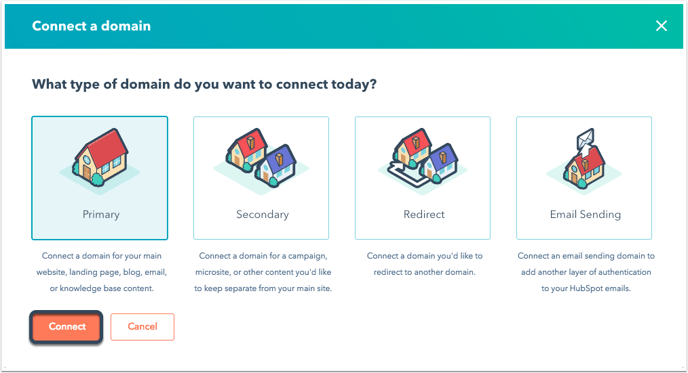
- Click Connect a domain.
- Select the type of domain you want to connect:
- Primary: the subdomain will be the default content host for the selected content types in HubSpot.
- Secondary: the subdomain can host HubSpot content, but isn't set as primary for any of your content types (Marketing Hub Professional and Enterprise, CMS Hub Professional and Enterprise only).
- Redirect: this subdomain won't host any content, but automatically redirects to another domain connected in HubSpot. If you have a CMS Hub Professional or Enterprise subscription, you can connect the root/apex domain as a redirect domain to send visitors from the root domain to a subdomain. For example, https://website.com to https://www.website.com.
- Email Sending: the subdomain will add another layer of authentication to your HubSpot emails. Learn more about how to connect an email sending domain.
- Click Connect.

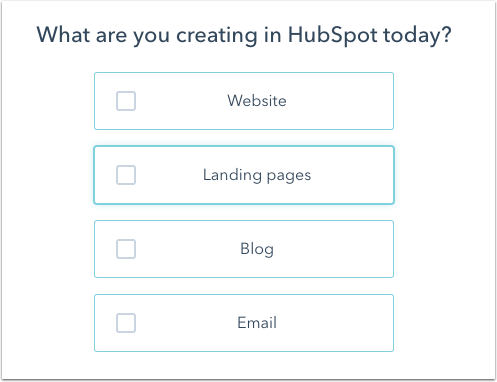
1. Content type
- Select the checkboxes next to the content types you plan to host on this domain.
Please note: the Email content type is for the web version of your marketing emails. Once connected, Marketing emails will use this domain for the web version URL, image URLs, and subscription preferences page URL. This is separate from the email sending domain, which is used to authenticate the From address used to send your marketing emails. Learn how to connect an email sending domain.

- Click Next.
2. Select domain
- In the text field, enter your domain. This is not the subdomain, but the root domain itself.

- Click Next.
3. Verify URLs
Set up the four components of your domain:- Subdomain: the subdomain is the first part of the domain name. For example, in blog.mywebsite.com, blog is the subdomain.
- If you have a CMS Hub Professional or Enterprise subscription, leave this field blank when connecting a redirect domain to redirect the root domain.
- If you have a CMS Hub Enterprise subscription, leave this field blank to host content on the root domain.
Please note: only connect subdomains that will be used to host HubSpot content. Connecting a subdomain that's used for hosting non-HubSpot website pages will cause those pages to break.
- Brand domain: the brand domain is between the subdomain and the top-level domain, otherwise known as a domain name. For example, in blog.mywebsite.com, mywebsite is the brand domain. If you are connecting a domain for the first time, this domain will be set as your account's brand domain. Learn more about brand domains.
- Top-level domain: the top-level domain is the end of the domain that comes after the brand domain. For example, in blog.mywebsite.com, .com is the top-level domain.
- Primary language: the primary language helps search engines understand the language of your page content for the subdomain. Learn more about managing multi-language content.

- Click Next.
4. Hosting setup
Set up your hosting with your DNS provider. For this step of the process, you'll need to log in to your DNS provider to access your DNS records. If you don't have access or are unsure how to do this, reach out to your IT team or contact your DNS provider directly.
For detailed instructions on editing your DNS records for the most common DNS providers, check out our DNS setup guide.
- If you use GoDaddy, click Update my CNAME. You'll then be prompted to log in to your GoDaddy account. This allows HubSpot to access your GoDaddy account and automatically update the CNAME record for the domain.
- If you are connecting your entire website to HubSpot, you'll still need to make some manual changes to your DNS records.

- If you're not using GoDaddy, or if you'd rather make the changes to your DNS configuration manually, click No, I'll set it up manually.
- Confirm that your content is ready to go live, then select the I am ready checkbox. If the domain is currently hosted elsewhere and has SSL, you'll see a message asking you to confirm that you own the domain. This will pre-provision SSL for the domain within HubSpot and reduce website downtime. Learn more about pre-provisioning SSL.
- Log in to your DNS provider. After logging in, select the I am logged in checkbox in HubSpot.
- In the main navigation menu of your DNS provider, navigate to DNS > DNS settings. If you can't find your DNS settings, reference the steps outlined by provider. Then, select the I'm there checkbox in HubSpot
- Copy the value in the Value column. In your DNS provider account, then paste the value into the Value/Points To/Target field for the CNAME record of the subdomain you're connecting. Once you've entered the value into the CNAME record, select the Done checkbox in HubSpot.

Please note: some providers, such as Network Solutions or GoDaddy, will add your brand domain and top level domain to the end of these DNS records automatically. For example, if you enter {hsdomainkey}.yourdomain.com, it will turn that value to {hsdomainkey}.yourdomain.com.yourdomain.com, which will result in a DNS error. Instead, copy the value but remove the .yourdomain.com part into the corresponding field in your DNS provider account.
-
- Once you update your DNS records, select the Done checkbox in HubSpot.
- Verify your DNS changes, then click Done. If you see a Waiting on DNS changes error, you may need to wait a few minutes before clicking check them again.
DNS changes can take some time to process. In most cases, DNS changes will propagate within a few minutes, though it can take longer depending on your DNS provider. If it's been more than an hour and you're still seeing an error, ensure that you've set up your DNS correctly and then contact HubSpot support.
SSL
Once your domain provisioning is complete, SSL will be enabled automatically. This usually takes a few minutes, but can take up to four hours. If you encounter any errors during the SSL provisioning process, see our troubleshooting guide for SSL certificate errors.
Learn more about SSL and domain security.