With HubSpot video, you can upload videos to the files tool, then add them to pages, marketing emails, blog posts, and knowledge base articles.
You can insert HubSpot videos in the video module in drag and drop marketing emails and drag and drop areas on pages. HubSpot video is also supported in rich text modules on pages, blog posts, and knowledge base articles.
To customize a visitor's experience with your HubSpot video, you can display a CTA or form before or after your video plays.
Please note: HubSpot video is powered by Vidyard and is separate from the Vidyard for HubSpot integration, which is a separate feature for paid Vidyard customers. Videos from your Vidyard account do not appear in the files tool in HubSpot.
Before you get started
- This article covers how to add video files uploaded to HubSpot to your HubSpot content. To add an external video from a URL or embed code, learn more about embedding external media in HubSpot.
- To use HubSpot video features, each user who wants to add videos must enable HubSpot video and accept the Vidyard terms of service.
- Accounts have a limit of 250 videos for HubSpot-hosted content. If you integrate a paid Vidyard account, this limit is determined by the limits of your Vidyard subscription.
- This limit does not apply to videos added to your one-to-one emails, templates, or sequences.
- Only videos with the Allow embedding, sharing, and tracking switch toggled on in the files tool count towards the maximum limit of 250 videos.
- New video files uploaded within the content editor will have Allow embedding, sharing, and tracking switched on automatically.
- Each browser supports different file types and, in some cases, will download the video file instead of playing it in the browser. Videos uploaded as .mp4 files are supported in most browsers and will play in the browser.
- Each video is subject to the limitations of the files tool.
Add videos to emails
HubSpot video is supported in the video module of the drag and drop email editor. Since video is not supported on most email clients, videos added to your marketing emails will appear as a thumbnail image with a video player button. This thumbnail image will link to a page where your email recipient can view your video.
- In your HubSpot account, navigate to Marketing > Email.
- Click the name of the email.
- In the sidebar editor, click the Video module and drag it into your email.
- In the Video type section, select HubSpot video.
-
- To select a video from the files tool, click Browse videos and select an existing video's thumbnail image.
- To upload a new video, click Upload and select a file from your computer. Then click the video's thumbnail image.
- To resize your video, in the sidebar editor, enter a width or height.
- To customize your video's information, in the Video details section, click Edit.
Please note: changes made to your video details will apply everywhere the video is used in HubSpot's content tools.
-
- In the right panel, click Change thumbnail image to change the preview image for your video.
- Click the slider and drag it to a specific point in the video or click Upload custom image to add a new image from your computer. Under the thumbnail image, click Done.
- Enter a file name, title, and/or description. This will help search engines understand your video's content.
- Click Done.

- To edit the appearance of your video's play button, click Style options.
- To customize the play button's color, enter a hex value or click the color picker to select a color.
- To customize the play button's size, enter a pixel value or click the slider and drag it to a new position. Your play button's live preview may take a few seconds to update.

- To ensure your video displays at full width on mobile devices, select the Show as maximum width on mobile devices checkbox. Videos will never display at a width larger than their original dimensions.
- To move the video to the right or left, click the Alignment dropdown menu and select Left, Center, or Right.
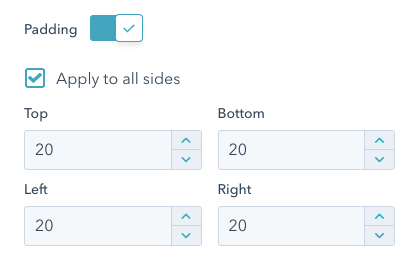
- To add space on the sides of your video, click to toggle the Padding switch on.
- Select the Apply to all sides checkbox to apply the same padding to all sides of the video.
- Enter pixel values for padding in the Top, Bottom, Left or Right text fields.
Add videos to pages, blog posts, and knowledge base articles
Videos can be added to blog posts, pages, and knowledge base articles in rich text modules. Drag and drop areas of pages also support adding videos to video modules.
Insert a video in a rich text module on a page, blog post, or knowledge base article
HubSpot videos can be added to rich text modules alongside text, images, links, or other content.
- In your HubSpot account, navigate to your website pages, landing pages, blog, or knowledge base.
- Hover over your page, post, or article and click Edit.
- In the content editor, click the rich text module.
- Click the Insert dropdown menu, then select Video > HubSpot video.
- In the right panel, select a video to insert:
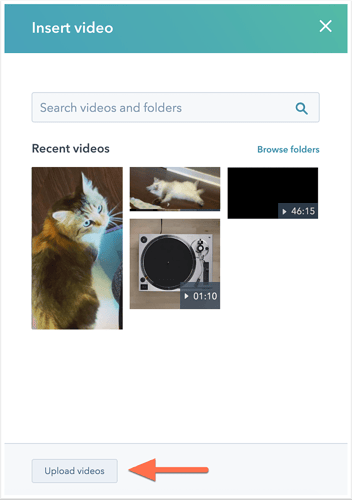
- To insert an existing video from the files tool, click the video's thumbnail image.
- To insert a new video, click Upload videos and select a video from your computer. Then click the video's thumbnail image.
- If you haven't enabled the HubSpot video features, a dialog box will appear. Click Turn on new features to enable HubSpot video for your user and accept the terms of service.
- To edit the color of your video's play button, click the backgroundColor player color dropdown menu and select a color. To enter a hex value or RGB color value, navigate to the Advanced tab.
- To adjust your video's position within a block of text, click the inline alignmentalalignment icons. Click the full width icon fullWidth to ensure your video displays at full width on mobile devices.
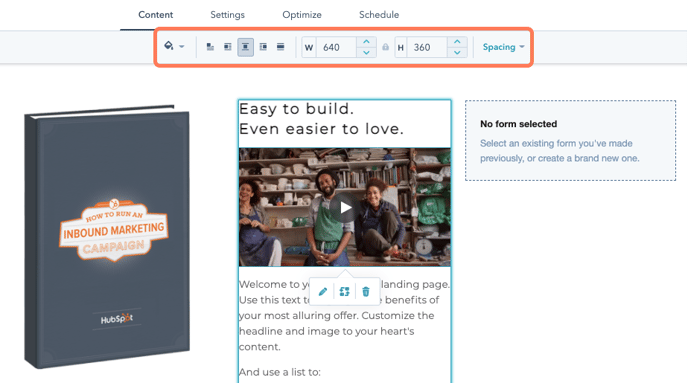
- To resize your video, enter pixel values for the width and height.
- To edit the padding around your video, click the Spacing dropdown menu and enter pixel values around the edges of the image icon.
- Within the content editor, click your video, then click the edit edit icon.
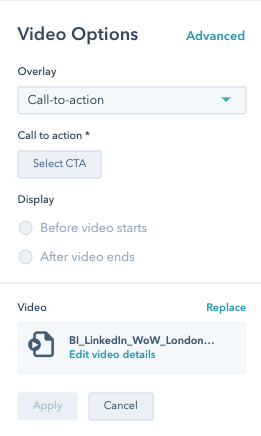
- In the pop-up box, click the Overlay dropdown menu and select Call-to-action or Form.
- Click Select CTA/form.
- In the right panel, select an overlay created for a different video, or click Create new to create new overlay content:
- Create a button CTA, then click Save.
- Customize your form's text and style, then click Add form.
Please note: an overlay form can only collect the First name, Last name, and Email fields. They also do not trigger form notifications. Overlay forms will create or update a contact if the Email field is included, or if you have allowed forms to create contacts without an email address.
- In the pop-up box, select a display time for your overlay. You can display your form or CTA before your video starts to play, or right after your video finishes playing.
Insert a video in a video module on a page
HubSpot video is supported in the video module added to a drag and drop area on a website or landing page. Landing pages created with starter templates don't support HubSpot video, but you can embed an external video instead.
- In your HubSpot account, navigate to Marketing > Website > Website Pages or Landing Pages.
- Hover over the page and click Edit.
- In the sidebar editor, click the Video module and drag it onto your page.

- In the content editor, click the video module.
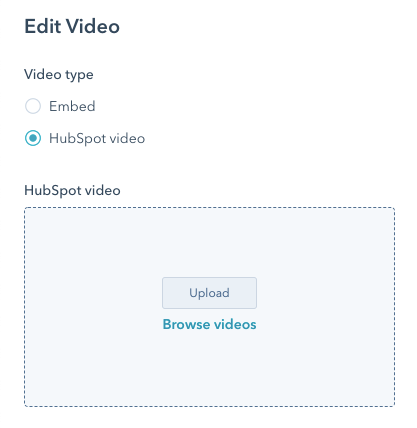
- In the sidebar editor, under Video type, select HubSpot video.
- Select a video file to add to your page:
- To select a video from the files tool, click Browse videos and select an existing video's thumbnail image.
- To upload a new video, click Upload and select a file from your computer.
- Select your video's maximum size:
- Original size: the video will not display larger than its original size.
- Full width: the video will take up the full width of the device it's viewed on.
- Custom: the video will not exceed a specific width and height set in the sidebar editor. Enter pixel values for these dimensions in the in the Width and Height text fields.
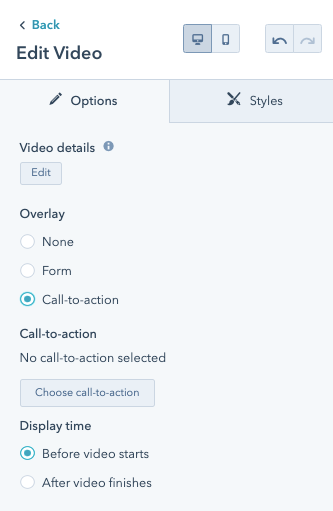
- In the Video details section, click Edit to customize your video's information.
Please note: changes made to your video details will apply everywhere the video is used in HubSpot's content tools.
-
- In the right panel, click Change thumbnail image to change the preview image for your video.
- Click the slider and drag it to a specific point in the video or click Upload custom image to add a new image from your computer. Under the thumbnail image, click Done.
- Enter a file name, title, and/or description. This will help search engines understand your video's content.
- Click Done.
- In the Overlay section, select Form or Call-to-action to add a form or CTA overlay to your video. Then click Choose call-to-action/form.
-
- In the right panel, select an overlay created for a different video, or click Create new to create new overlay content:
- Create a button CTA, then click Save.
- Customize your form's text and styling, then click Add form.
- In the right panel, select an overlay created for a different video, or click Create new to create new overlay content:
Please note: an overlay form can only collect the First name, Last name, and Email fields. They also do not trigger form notifications. Overlay forms will create or update a contact if the Email field is included, or if you have allowed forms to create contacts without an email address.
-
- In the sidebar editor, select a display time for your form or CTA. This can be before your video starts to play, or right after your video finishes playing.
- To edit your play button's color, click Style options, then enter a hex value or click the color picker and select a color.

- Click Apply changes.
Analyze video performance (pages, blog posts, and knowledge base articles only)
Please note: video views are not currently available for videos added to marketing emails.
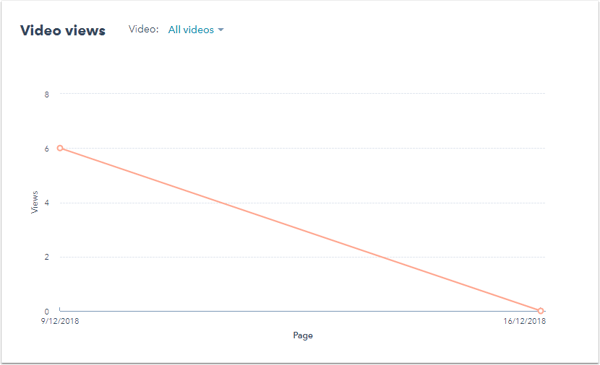
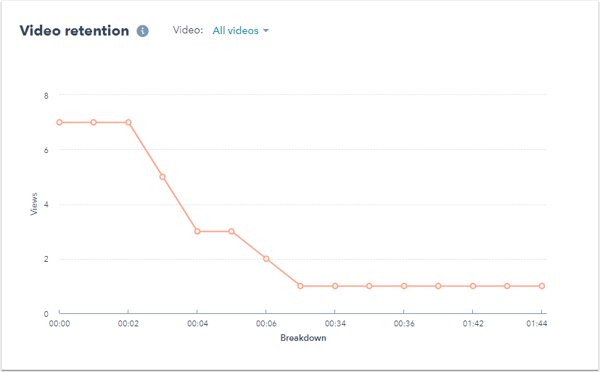
After adding a video to your HubSpot page, blog post, or knowledge base article, you can analyze the video's performance through metrics like view count and video retention. View these metrics on the content details page, in custom reports, and on contact timelines.
Video views in page performance
- Navigate to your blog, landing pages, website pages, or knowledge base.
- Click the name of a post, page, or article to view its Performance details.
- If there's more than one HubSpot video on the page, in the upper left, click the Video dropdown menu and select a video.
- Analyze your video plays:
- Video views: the number of times your video loaded on your page in a visitor's browser.
- Video retention: a measure of which parts of your video content were played.
- Video views: the number of times your video loaded on your page in a visitor's browser.
Video views on a contact record
Please note: video activities on the contact timeline and custom reports are only available for HubSpot videos. External video files embedded with a URL won't be tracked the same way.
To see video views on a contact record:
- In your HubSpot account, navigate to Contacts > Contacts.
- Click the name of a contact.
- To filter contact activity by video views, click Filter activity, then select the Video views checkbox.

Video views in custom reports (Marketing Hub Enterprise only)
Please note: video activities on the contact timeline and custom reports are only available for HubSpot videos. External video files embedded with a URL won't be tracked the same way.
In the custom report builder, you can select Video as a data source in custom reports.
Users with Account Access permissions can enable this data source in your Tracking & Analytics settings:
- In your HubSpot account, click the settings icon settings in the main navigation bar.
- In the left sidebar menu, click Tracking & Analytics > Attribution.
- In the Interaction Types section, click to toggle the Viewed video switch on.
- Click Save.